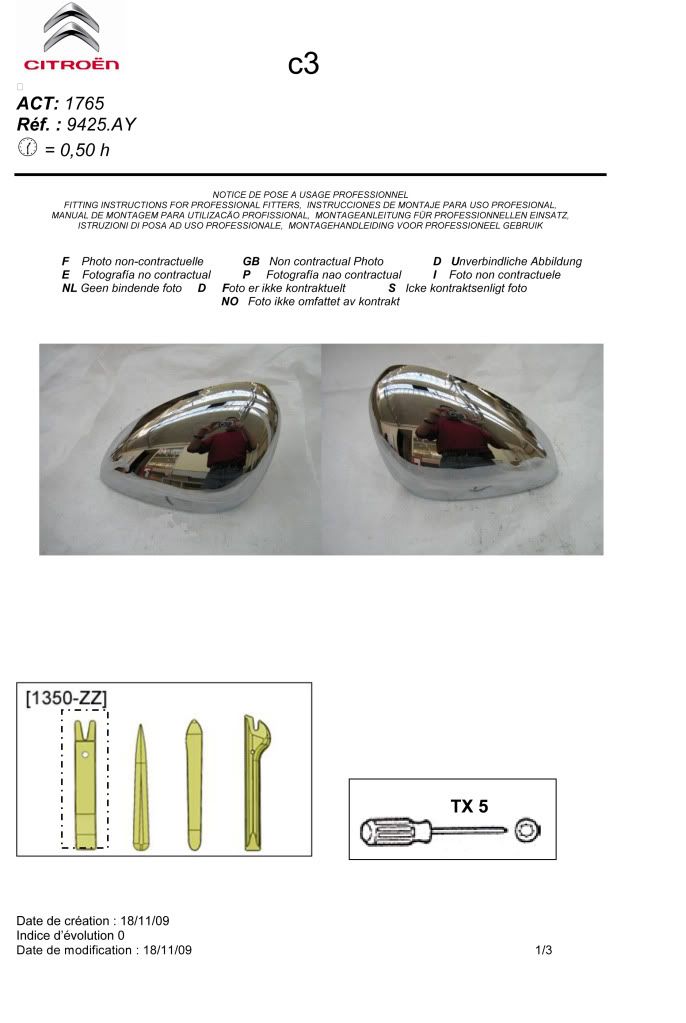
Anyone have any idea how to remove the mirror covers. Tried to take 'em off, but was too affraid that i break them by forcing them out. :S
Announcement
Collapse
No announcement yet.
Removing mirror covers?
Collapse
X
-
Still waiting... wasn't too keen to remind you or anything. <3
Nvm, it wasn't you who promised the find the instruction for me yesterday, so ignore the waiting part od my post. Last edited by DS3Finland; 03-10-2011, 19:05.
Comment
-
*Preparing to buy new mirrors*
With my luck, im so going to break 'em... Still going to pop em out. :P
TX5..? seriously..? That's way too small to be correct... TX8 i could live with. :S So the electric motor is attached to the covers (doesn't seem like it from looking at the pictures).
That guide looks like it's also for replacing the motor or something... I need to see it myself to make sure if you need to pull all the bits out before removing the cover. Will post when i get it done (or when i break something).
Thx a million fror the guide.
Comment
-
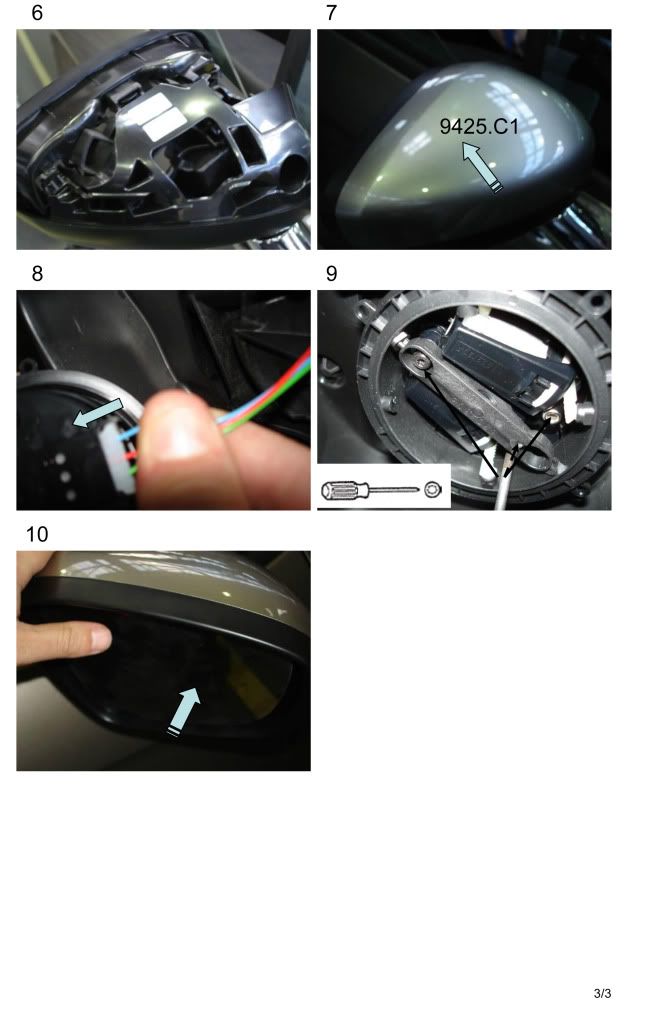
Basically
* Pop the mirror off
* Unscrew two screws
* Disconnect a wire thing
* Un clip the cover
This how mine went
Dad - 'Whats that you have there'
Me - 'oh, some new mirror covers'
D - 'Want me to put them on'
M- 'Yeah, hang on I'll print the instructions'
No Dad
M - 'Dad??'
He has now vanised with mirror caps
M -DAD?? Wait, I have the instructions'
Cue printer fail
M - 'DAD, wait! I'm gettting them'
M - 'Right, here you go'
Dad pauses, looks over them with one mirror cap off
Dad - 'Oh you need to unscrew something? Well lets do that on the next one'
Later
Dad - 'So Joni, you know plastic fatigues and you might not be able to take those off and put on again'
Since then he asks me every time - 'Are you mirror caps ok?'
Comment
-
Damn heated mirrors... Hope i didn't break em when i took the mirror off. Theres several clips that needs to come off before the covers falls to the ground ( ), but only those two showing in the pics are accessible. Still don't see why you have to unscrew anything (and it's tx8 like i suspected), but i did, just in case. was way too dark to take any pics, but theres atleast one pic thats going to help someone i hope. Going to upload it when im done wrapping.
Comment
-
Good stuffOriginally posted by JohnDigital View PostThanks for posting the instructions and info very helpful.
Did mine today and all went well. Changed from Black to Chrome finish.
A bit nerve wracking poping the mirrors off!!
At least they did not break.
Thanks again
John
Here to help
Comment
-
Bigfeet's File Repository...I should never have doubted the Lord of Bacon!!
The DS3Club Bacon Appreciation Society
Comment
-
lol, now that u mention, yea i suppose!Originally posted by Bigfeet76 View PostJust me or did anybody else see this...
[ATTACH=CONFIG]3350[/ATTACH]
...and got reminded of this?
[ATTACH=CONFIG]3351[/ATTACH]
 Polar white with black roof, black bellones - My Photies!!
Comment
-
Just what I needed I need to take mine off to look at the mirror internals.2012 Dsport +, white with black roof. Stubby aerial, Alloy DS3 tax disc holder, Alloy black and silver dustcaps and 3D Gel carbon affect plates. Now with kawasaki green painted brakes.
Comment
-
I am a bit bemused by all the concern over changing wing mirror covers unless I'm missing something
I have electronic mirrors on the basis that the mirror glass can be moved by a button on drivers side. Not electrically retractable/folding mirrors.
They are not heated mirrors either
To get the black covers of I inserted a screwdriver and just "pinged" the covers off with the screwdriver. Took about 20 careful seconds
Then just put the mirror covers on- to me it was that simple. Cant tell the difference other than they are mirrored covers!
Why all the taking the internals out, and mirror lense out etc etc
Just trying to help
CBLUEsigpicJog on Noddy
Comment


Comment